13,Nov 2026
I can install UV Marble Wall Panels over many existing interior wall surfaces when the substrate is flat, dry, clean, stable, and compatible with the selected adhesive. The basic sequence is to inspect and prepare the wall, plan the layout, measure and cut panels, apply adhesive, position and press the panels, seal joints and edges, then allow the installation to cure before use.
!
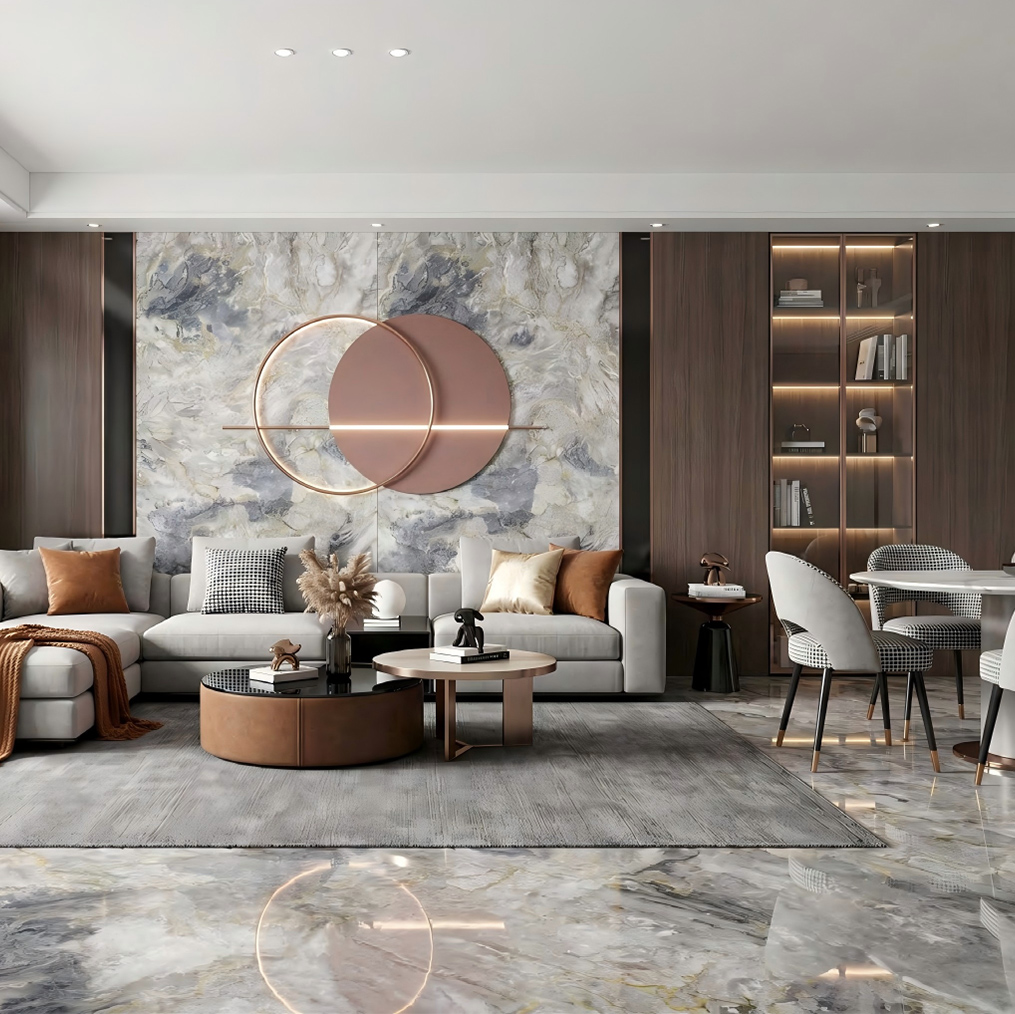
UV marble wall panels are decorative wall cladding products designed to create a marble appearance without installing individual stone slabs or ceramic tiles. Many products use a polymer-based or PVC-based core with a printed marble design and a UV-cured surface coating. The exact thickness, backing construction, fire classification, temperature range, and wet-area rating vary by manufacturer, so I check the product specification before selecting an installation method.
The UV coating primarily protects the decorative surface from abrasion, staining, and light exposure. It does not automatically make every wall assembly waterproof, and it does not replace a shower waterproofing membrane, vapor management system, or properly sloped wet-area construction. I treat the panel as a finish layer unless the complete product system has documented approval for a specific wet-area application.
These panels are commonly used on bathroom feature walls, vanity walls, kitchen backsplashes, bedroom accent walls, reception areas, retail interiors, and other locations where a marble-look finish is needed. They are generally lighter and faster to handle than natural marble, but they still require accurate substrate preparation and controlled joint sealing.
I use UV marble wall panels when the project requires a large decorative surface with fewer joints than small-format tile. A panel can cover a broad area with one continuous pattern, reducing grout lines and simplifying routine cleaning. The installation can also avoid the demolition, dust, disposal, and substrate damage associated with removing sound existing tile.
The main limitations are equally important. Panels can telegraph bumps or tile ridges if the backing is not corrected, and an incorrect adhesive may cause bubbles, staining, loss of bond, or surface distortion. A panel system is also less forgiving around corners, outlets, plumbing penetrations, and irregular walls than a simple flat-wall application.
Compared with ceramic tile, UV marble panels usually require fewer joints and no cement grout, but ceramic tile offers a wider range of tested wet-area systems and surface textures. Compared with natural marble, panels are lighter and easier to cut, while natural marble provides genuine stone variation and a mineral surface that requires different sealing and structural support considerations.
Before starting, I prepare all tools and materials so the panels are not left exposed while I search for missing equipment. The following checklist covers a standard interior installation, although shower work may require additional waterproofing products and trade-specific tools.
| Category | Recommended items | Installation purpose |
|---|---|---|
| Measuring | Tape measure, steel rule, laser level, framing square, pencil, templates | Accurate layout and opening locations |
| Wall preparation | Scraper, sanding block, vacuum, degreaser, repair compound, straightedge | Cleaning, leveling, and defect correction |
| Cutting | Fine-tooth circular saw blade, jigsaw blade, utility knife, hole saw, drill | Straight cuts, notches, outlets, and pipe openings |
| Bonding | Substrate-compatible adhesive, compatible primer, caulking gun, spreader | Adhesive application and substrate conditioning |
| Sealing | Neutral-cure silicone or specified sealant, backer rod, masking tape | Joints, corners, penetrations, and edges |
| Finishing | Inside and outside trims, end caps, joint profiles, roller, rubber block | Alignment, pressure, and exposed-edge protection |
| Safety | Safety glasses, cut-resistant gloves, hearing protection, respirator where required | Protection during cutting and preparation |
| Protection | Spacers, temporary supports, clean blankets, protective film | Movement control and surface protection |
I also confirm the panel batch, color, pattern direction, dimensions, and quantity before cutting. I normally allow at least 10% extra material for simple layouts and more where the wall includes several corners, outlets, niches, or diagonal cuts. The actual allowance should reflect the panel size and layout rather than a fixed percentage alone.
The wall must be stable before I consider the decorative surface. I press and tap existing tile to identify hollow or loose areas, inspect drywall for swelling or delamination, and look for cracks, active leaks, mold, grease, wallpaper residue, and peeling paint. Any movement, moisture source, or unstable backing must be corrected before panels are installed.
For drywall, I remove loose paper, repair damaged sections, and confirm that the board is firmly fastened to the framing. For plaster or masonry, I repair cracks and weak areas, then remove dust and friable material. For painted walls, I test adhesion in doubtful areas and sand glossy paint so the primer or adhesive can form a mechanical bond.
I use a straightedge or long level to check the wall in several directions. As a practical installation target, I correct pronounced deviations before bonding; many panel systems perform better when variation is limited to approximately 3 mm over a 2 m span, but the panel manufacturer’s tolerance takes priority. Local high spots should be sanded or ground, while low areas should be filled with a compatible repair compound and allowed to dry fully.
The wall must be clean and dry. I remove soap film, oil, dust, silicone residue, and construction debris, then allow the surface to dry before priming or applying adhesive. I do not install over active dampness, condensation, or a wall that feels cold and wet because trapped moisture can reduce adhesion and cause biological growth behind the panel.
Yes, UV marble wall panels can be installed over existing tile when the tile is firmly bonded, dry, clean, and sufficiently flat. I remove loose tiles, fill depressions, abrade glossy surfaces where permitted, and degrease the wall before applying a compatible primer or adhesive. Deep grout lines and raised tile edges may need leveling so they do not telegraph through the panel.
I do not bond directly over cracked, hollow, greasy, damp, or heavily textured tile. If the tile surface moves under pressure or the wall contains repeated loose areas, I remove the unstable finish and rebuild the backing. Installing over tile saves demolition only when the original substrate can reliably support the new load.
The best adhesive for UV marble wall panels depends on the backing material, wall substrate, panel size, temperature, humidity, and exposure to water. I match the adhesive to the technical data sheet rather than selecting a generic construction adhesive by appearance alone. Common categories may include panel adhesive, MS polymer adhesive, polyurethane adhesive, or another product specifically approved for the panel substrate.
For painted drywall, I confirm that the paint is sound and use the primer and adhesive combination specified for nonporous or semi-porous surfaces. For ceramic tile, I usually require a cleaner, surface abrasion where approved, and a primer intended for dense tile or glazed surfaces. For masonry, cement board, or repaired plaster, I verify alkalinity, porosity, moisture content, and drying condition before bonding.
I check the adhesive’s open time, cure time, bead size, service temperature, movement capability, and compatibility with PVC or polymer surfaces. I avoid solvent products that can attack the panel backing or discolor the decorative layer. If the adhesive manufacturer requires a test bond, I perform it on a small area and observe adhesion after the stated period before continuing.
I dry-fit the panels before cutting. I mark the most visible vertical reference line, locate the panel seams away from prominent corners where possible, and align the marble pattern across adjacent panels. For a bathroom wall, I also mark the centerline of the vanity, plumbing fixtures, niches, and major lighting features so the layout appears intentional.
I measure each panel location separately because existing walls are rarely perfectly square. I record the top, bottom, left, and right dimensions, then transfer them to the back or protective face of the panel. I label each piece by wall position and confirm the finished side before cutting.
I leave the clearance specified by the panel system at floors, ceilings, corners, and fixed objects. When no product-specific dimension is provided, a small controlled gap, often around 2–3 mm, is commonly used for movement and later filled with compatible sealant or covered by trim. I never close the panel tightly against a rigid obstruction because temperature and humidity changes can create buckling or joint stress.
I cut panels on a clean, well-supported surface with the decorative face protected from scratches. Straight cuts can be made with a fine-tooth saw blade selected for polymer sheet materials, while smaller trims may be scored and snapped only when the product instructions allow it. I use a sharp blade, steady feed rate, and dust collection to reduce chipped edges and heat buildup.
For outlets, valves, and pipes, I create a cardboard or thin-board template first. I transfer the opening after checking its position against the actual wall, then drill from the finished side with the correct hole saw or begin with a pilot hole. I keep openings slightly controlled rather than forcing the panel against the fitting, because the final perimeter must accept sealant or an escutcheon.
I dry-fit every cut panel before removing the protective film. This is where I check corner clearances, seam alignment, trim depth, and whether the marble pattern runs in the intended direction. Cutting directly from a single measurement without a trial fit is one of the most common causes of avoidable material loss.
I apply adhesive according to the product instructions, using the specified bead pattern or notched spreader. The adhesive must provide enough contact to support the panel without creating large unsupported voids, but excessive adhesive can create squeeze-out, unevenness, and extended curing time. I keep adhesive away from the panel perimeter when the system requires a sealant joint rather than a fully blocked edge.
I position the panel from the planned reference line and use temporary spacers or supports to maintain the required gaps. I press from the center toward the edges with a clean roller or rubber block, working out trapped air and confirming contact across the surface. I check plumb, level, seam width, and pattern alignment before the adhesive develops a skin.
Large panels may require temporary bracing or additional support during curing. I do not slide the panel repeatedly after contact because movement can spread adhesive away from the intended bond area. I remove visible adhesive from the face immediately with the cleaner approved for the panel finish, avoiding abrasive pads and unapproved solvents.
After positioning, I seal the locations that require protection from water, dust, or movement. These commonly include vertical seams, inside corners, outside corners, the base of the wall, plumbing penetrations, outlet cutouts, and exposed panel edges. I use the sealant type and color specified for the system, with neutral-cure silicone often preferred where it is compatible with the panel and adjacent materials.
I apply masking tape on both sides of a joint, install backer rod where the gap is deep, and tool the sealant to create a continuous profile. The sealant must contact both sides of the joint without gaps, pinholes, or three-sided adhesion where movement is expected. I remove masking tape before the sealant skins and inspect the joint under strong light.
Trim profiles can protect exposed edges and provide a more consistent corner finish. I cut trims accurately, dry-fit them before adhesive application, and ensure that the trim does not force the panel out of plane. Sealant at the base of a bathroom wall should not be treated as a substitute for a properly designed waterproofing system behind the finish.
Curing time depends on adhesive thickness, temperature, humidity, ventilation, substrate absorption, and panel size. I follow the adhesive label and panel instructions rather than relying on a fixed timetable; many products require approximately 24–48 hours before light contact, while thicker beads or humid conditions may require longer. During this period, I prevent vibration, impact, water exposure, and movement at the seams.
I keep protective film on the surface during cutting and most finishing work, but I remove it within the period specified by the panel supplier so heat, sunlight, or adhesive residue does not make removal difficult. I ventilate the room without directing strong airflow that could pull dust into wet sealant or cause uneven drying.
My final inspection checks panel flatness, bond contact, seam continuity, corner seals, trim alignment, open gaps, scratches, chips, pattern direction, and fixture clearances. I also confirm that no adhesive has hardened on the visible surface and that all plumbing and electrical openings have appropriate finishing components. Only after the adhesive and sealant have reached their stated cure condition do I return the wall to normal cleaning or wet use.
The most frequent failures come from treating the panel as a cover for an unprepared wall. I do not use panels to conceal active leaks, unstable tile, swollen drywall, or major wall distortion. If the backing cannot be made flat and stable, I rebuild it before installation rather than expecting adhesive to compensate for structural movement.
I acclimate panels indoors according to the product instructions before cutting, especially when they arrive from a cold warehouse or hot vehicle. I store them flat on a supported surface and avoid bending large sheets. I also keep a record of the panel batch and inspect all visible faces before installation because pattern and gloss differences are difficult to correct after bonding.
For bathrooms and shower areas, I distinguish decorative water resistance from complete waterproofing. A sealed panel surface may resist splashes, but the wall assembly still needs an approved waterproof backing, correctly treated corners, sealed penetrations, and compatible transitions when the area receives direct or continuous water. If the manufacturer does not approve the specific panel for shower exposure, I use it only in suitable low- or intermittent-moisture locations.
How to Install UV Marble Wall Panels on Existing Interior Walls depends less on forceful bonding and more on controlled preparation. I inspect the substrate, correct instability and unevenness, select an adhesive for the actual wall materials, plan the pattern, cut with templates, maintain movement gaps, seal every required joint, and respect the full curing period.
For homeowners, the most important decision is whether the existing wall is stable enough to remain in place. For contractors, the key controls are substrate records, adhesive compatibility, seam planning, opening accuracy, and final inspection. UV Marble Wall Panels can provide a practical marble-look finish for many interior renovations, but they should be installed as part of a complete wall system rather than treated as a replacement for structural repair or wet-area waterproofing.
Before ordering materials, confirm the panel dimensions, backing type, installation temperature, adhesive approval, sealant requirements, wet-area limitations, and recommended tolerances. Then prepare at least one test area or sample bond when the substrate or adhesive is unfamiliar. This process reduces rework and provides a more reliable result than installing directly over an unverified existing finish.
Feel free to reach out for any queries. We would be happy to help!
We look forward to working with you.
Navigation
Navigation
Contact Us
Telephone: 0086-757-83327093
E-mail: jbn002@jbnjbn.com
WhatsApp: +86 136 9028 1303
WeChat: +86 136 9028 1303
Address:Building 4, Area B, Ceramics International Trading Center, Jihua Xi Road, Foshan, Guangdong, China
Get in Touch
Get in Touch