02,Oct 2026
Choosing rustic tiles for a contemporary bathroom can be difficult when you want natural texture without creating a dark, dated room. A reliable Porcelain and Ceramic Tile Supplier can help you compare rustic tiles for modern bathrooms, modern rustic bathroom tile ideas, and how to combine rustic and modern tiles. The key factors are bathroom waterproofing, slip resistance, and professional specifications such as PEI rating, DCOF, and water absorption. This guide explains how to plan the layout, select materials, install the tiles, and avoid common failures.

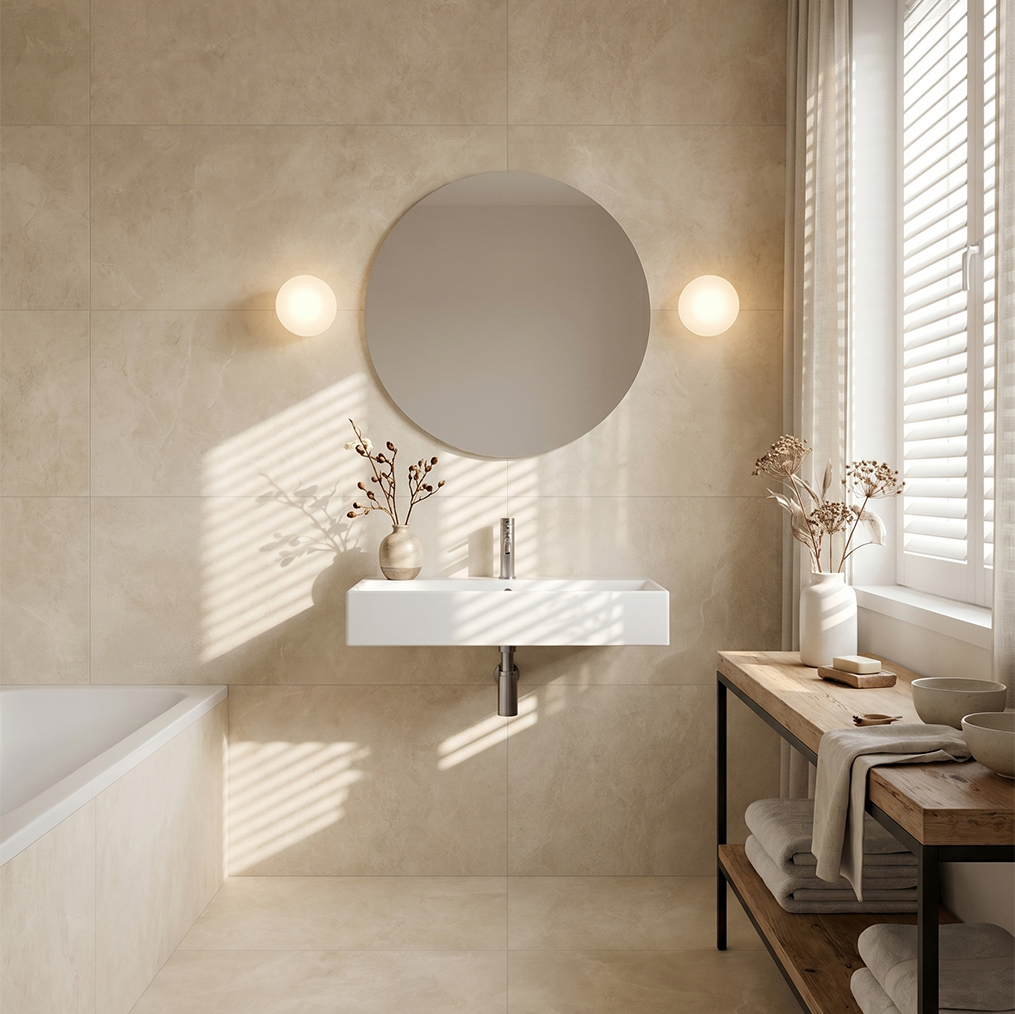
Rustic tile does not have to mean farmhouse style. In a modern bathroom, its uneven color, stone-like surface, handmade appearance, or wood-inspired grain can soften polished fixtures and flat white walls. The contrast works especially well when the bathroom includes frameless glass, wall-mounted furniture, matte black hardware, or a simple freestanding bathtub.
The main design problem is balance. Too much distressed texture can make a small bathroom look crowded, while too much smooth white tile can make the room feel sterile. A practical approach is to use rustic tile as one controlled visual layer:
For many bathrooms, the most successful formula is approximately 60% calm background tile, 30% rustic feature tile, and 10% contrasting details such as grout, metal fittings, or timber accessories. This is not a mandatory design rule, but it gives homeowners a measurable starting point before ordering samples.
Porcelain and ceramic tiles are both made from clay-based materials, but their performance differs. Under ASTM C373, porcelain tile is generally defined by water absorption of 0.5% or less. That low absorption makes porcelain suitable for wet floors, shower walls, and bathrooms with frequent temperature or humidity changes. Standard ceramic tile can also perform well on walls and low-moisture areas, but its water absorption and strength vary by product.
| Tile characteristic | Recommended use | What to check with the OEM Tile Supplier |
|---|---|---|
| Porcelain, matte finish | Bathroom floors, shower floors, vanity walls | Water absorption ≤0.5%, wet DCOF, PEI rating |
| Glazed ceramic | Shower walls, backsplashes, low-impact wall areas | Surface durability, glaze quality, edge accuracy |
| Terracotta-style tile | Dry feature walls or carefully sealed floors | Sealing requirements, absorption, maintenance instructions |
| Wood-look rustic porcelain | Bathroom floors and feature walls | Slip resistance, plank warpage, shade variation |
Do not select rustic bathroom tile only from a showroom photograph. Ask for the technical data sheet and confirm the following specifications:
Tile size changes how the bathroom feels. A 600 × 1200 mm stone-look porcelain tile can reduce grout lines and visually enlarge a narrow wall. A 75 × 300 mm handmade-look ceramic tile creates a more detailed backsplash or shower niche. Hexagons, zellige-inspired tiles, and irregular-edge tiles add character, but they require more layout planning and often more grout cleaning.
For a modern rustic bathroom, consider these combinations:
The substrate must be structurally sound, clean, dry where required, and sufficiently flat. Large-format tiles are especially sensitive to uneven surfaces. A practical industry reference is to limit variation to approximately 6 mm over 3 m for many standard tile installations, while large-format tile systems may require tighter tolerances such as 3 mm over 3 m. Confirm the exact requirement with the adhesive and tile manufacturer.
Inspect these areas before installation:
Measure the room and draw every wall, door, drain, niche, window, and vanity. Mark the centerline of the most visible wall, then dry-lay several rows of tile on the floor or use cardboard templates. Avoid ending with a strip narrower than half a tile at a prominent corner. If a layout produces a 35 mm sliver, shift the starting line so the cuts are distributed more evenly.
For patterned rustic tile, number the pieces during the dry layout. High-variation tile should be mixed from at least three boxes so dark and light pieces do not form accidental blocks.
Tile and grout are not the waterproofing layer. Apply a continuous waterproofing system behind or beneath the tile in the shower and other wet areas. Treat inside corners, outside corners, wall-to-floor joints, valves, and pipe penetrations according to the membrane manufacturer’s instructions.
Allow the membrane to cure for the stated time before tiling. Skipping this step can allow water to reach framing or subfloor materials even when the finished tile surface looks intact.
Use rustic tile where it supports the room’s focal point. A good location may be the wall behind the vanity, the shower back wall, or a recessed niche. Keep transitions deliberate: align the top edge of the rustic tile with a grout line on the adjacent modern tile whenever possible.
When combining different tile thicknesses, use a suitable transition profile or adjust the substrate. Do not rely on a thick layer of adhesive to hide a large height difference.
Mix only the quantity that can be used within the adhesive’s open time. A common mistake is adding extra water after the mortar begins to stiffen. This changes the mixture and can weaken the bond.
Comb the mortar in one direction with the correct notched trowel. For large-format porcelain, back-butter the tile when recommended and aim for high mortar coverage. In wet areas and on floors, periodically lift a tile to check coverage rather than assuming the ridges have collapsed.
Press each tile into place with a slight perpendicular movement to collapse the adhesive ridges. Use spacers or a leveling system, but do not force uneven handmade-look edges into a perfectly rigid grid. These tiles often look more authentic with consistent nominal joints and controlled natural variation.
Clean adhesive from the tile face and joints before it hardens. Rustic textures can trap mortar, making final cleaning much more difficult.
Measure cuts twice, especially around shower controls and wall niches. A diamond hole saw is safer for round plumbing penetrations than repeatedly striking the tile. Keep cut edges under trim plates or in less visible locations when possible.
At changes of plane, such as wall-to-wall and wall-to-floor corners, leave the movement gap specified by the system and fill it with a flexible sealant rather than rigid grout.
Wait until the adhesive has cured according to its technical sheet. Press grout firmly into the joints with a float held at approximately 45 degrees. Remove excess diagonally across the joints to avoid pulling grout out.
For rustic tiles with recessed edges, work in smaller areas and clean the surface before the grout film dries. Use a grout color that supports the design:
Many porcelain tiles do not require sealing, but cement-based grout and porous ceramic or terracotta-style tiles may. Test a spare tile or an inconspicuous area first. Apply sealer only to a clean, dry surface and remove residue before it cures.
Sealer does not replace waterproofing and does not make an unsuitable floor tile safe. It mainly reduces absorption and can make routine cleaning easier.
Keep the installation dry for the period specified by the adhesive, grout, and sealant manufacturers. Avoid placing heavy furniture or using the shower too early. After curing, clean with a pH-neutral product and a soft brush or microfiber cloth.
Inspect silicone joints every six to twelve months. Replace cracked or separated sealant promptly, particularly around the shower tray, bathtub, and plumbing fixtures.
In one documented small-bathroom renovation, a homeowner had a room measuring approximately 2.1 m by 1.8 m with limited natural light. Her first idea was to use dark slate-look tile on all four walls. During the sample review, the darker surface made the room appear visually narrower and showed soap marks clearly.
The final scheme used a matte, warm-gray porcelain tile measuring 600 × 1200 mm on the floor and the main shower walls. A smaller handmade-look ceramic tile in a muted sand color was limited to the vanity wall and niche. The homeowner selected a warm-gray grout rather than bright white and used a frameless glass screen with brushed stainless-steel fittings.
After completion, the homeowner reported that the room felt brighter and was easier to clean because the large-format floor reduced the number of grout joints. The important lesson was not that one color is universally better. It was that limiting the high-texture tile to approximately one-third of the visible wall area created contrast without overwhelming the 3.78-square-meter room.
Problem: Online images may not show shade variation, surface roughness, or the true grout effect.
Solution: Order physical samples from the OEM Tile Supplier. View them under daylight, warm artificial light, and bathroom lighting. Place the samples beside the vanity, metal fittings, paint, and flooring.
Problem: A polished surface may become slippery when wet, even if it looks luxurious.
Solution: Select a floor-rated matte or textured product and verify its wet DCOF classification. Do not infer slip resistance from the word “rustic” alone.
Problem: Deep relief creates shadows, collects residue, and competes with mirrors, lighting, and fittings.
Solution: Use textured rustic tile on one wall, one niche, or a limited backsplash. Keep the remaining surfaces flatter and easier to wipe.
Problem: Rustic ceramic wall tile may be thinner than a porcelain floor tile, leaving an uneven edge.
Solution: Confirm thickness before ordering and use a metal or PVC transition profile where necessary. Plan the transition before adhesive is applied.
Problem: Building movement can crack grout at wall-to-wall or wall-to-floor joints.
Solution: Leave the required movement gap and use a color-matched flexible sealant. Grout should not bridge changes of plane.
Problem: A replacement box may come from a different shade or caliber batch.
Solution: Order at least 10% extra for a simple layout and consider 15% to 20% for complex patterns, diagonal cuts, or high-variation rustic products. Store leftover tiles in a dry, labeled location.
Problem: Strong acids can damage cement-based grout, natural-looking finishes, or sealers, while abrasive powders can dull glazed surfaces.
Solution: Begin with warm water and a pH-neutral cleaner. Follow the tile and grout manufacturer’s maintenance instructions before using any stronger chemical.
When requesting samples or a quotation from JBN, provide more than the room’s square meterage. Include the intended application, tile size, preferred finish, color range, grout width, wall or floor location, and whether the area is a shower floor. Ask for the product’s water absorption, PEI classification where applicable, wet DCOF data, shade variation, caliber, thickness, recommended adhesive, and cleaning instructions.
Also request production and packaging information. Confirm the minimum order quantity, sample availability, lead time, carton coverage, batch consistency, and replacement policy. These details are particularly important for rustic tiles because shade variation is part of the design but uncontrolled batch differences can make a completed wall look patchy.
Rustic tiles work in modern bathrooms when texture is controlled, performance is verified, and the layout is planned before installation. Use porcelain with water absorption of 0.5% or less for demanding wet applications when appropriate, verify a suitable wet DCOF for floors, select a PEI rating that matches residential traffic, and keep high-variation tile to a clearly defined area. A balanced scheme combines modern proportions, bathroom waterproofing, slip resistance, and careful grout selection with the warmth of natural texture. These rustic tiles for modern bathrooms, modern rustic bathroom tile ideas, and how to combine rustic and modern tiles principles help create a durable result with measurable specifications rather than relying on adjectives such as “strong” or “easy.”
Yes, provided the product is rated for floor use and has suitable wet slip-resistance data. A rustic appearance does not automatically make a tile safe. Check the manufacturer’s DCOF classification, water absorption, surface finish, and local building requirements.
Porcelain usually offers lower water absorption and higher density, which makes it a common choice for shower floors and walls. Ceramic tile can be appropriate for shower walls, especially when the product is designed for wet areas. The decision should be based on the technical sheet rather than the material name alone.
A close-match grout creates a quieter, more contemporary appearance and makes irregular edges less noticeable. A contrasting grout emphasizes the pattern but can increase visual activity and cleaning demands. Mid-tone gray, beige, or taupe often provides a practical balance for warm rustic tile.
For a straightforward installation, 10% extra is a common starting point. For diagonal layouts, small-format tile, niches, irregular walls, or products with strong shade variation, 15% to 20% may be more appropriate. Confirm the allowance with the installer and OEM Tile Supplier.
Most porcelain tiles do not need sealing, but the grout may require it. Some rustic-look products, especially porous ceramic or terracotta-style tiles, do require sealing. Follow the manufacturer’s instructions and test the sealer on a spare piece before applying it to the finished installation.
Use lighter colors, large-format background tiles, consistent grout tones, and a limited feature area. Install floor tiles in a continuous direction toward the shower or doorway, and avoid dividing the room with too many contrasting borders. A frameless glass screen and adequate lighting can also preserve visual openness.
Ask JBN for the technical data sheet, physical samples, shade and caliber information, recommended installation method, wet DCOF or slip classification, water absorption, PEI rating where applicable, carton coverage, minimum order quantity, lead time, and batch replacement policy. These details allow you to compare products accurately and reduce the risk of ordering a tile that looks attractive but is unsuitable for the intended bathroom location.
Feel free to reach out for any queries. We would be happy to help!
We look forward to working with you.
Navigation
Navigation
Contact Us
Telephone: 0086-757-83327093
E-mail: jbn002@jbnjbn.com
WhatsApp: +86 136 9028 1303
WeChat: +86 136 9028 1303
Address:Building 4, Area B, Ceramics International Trading Center, Jihua Xi Road, Foshan, Guangdong, China
Get in Touch
Get in Touch