10,Nov 2026
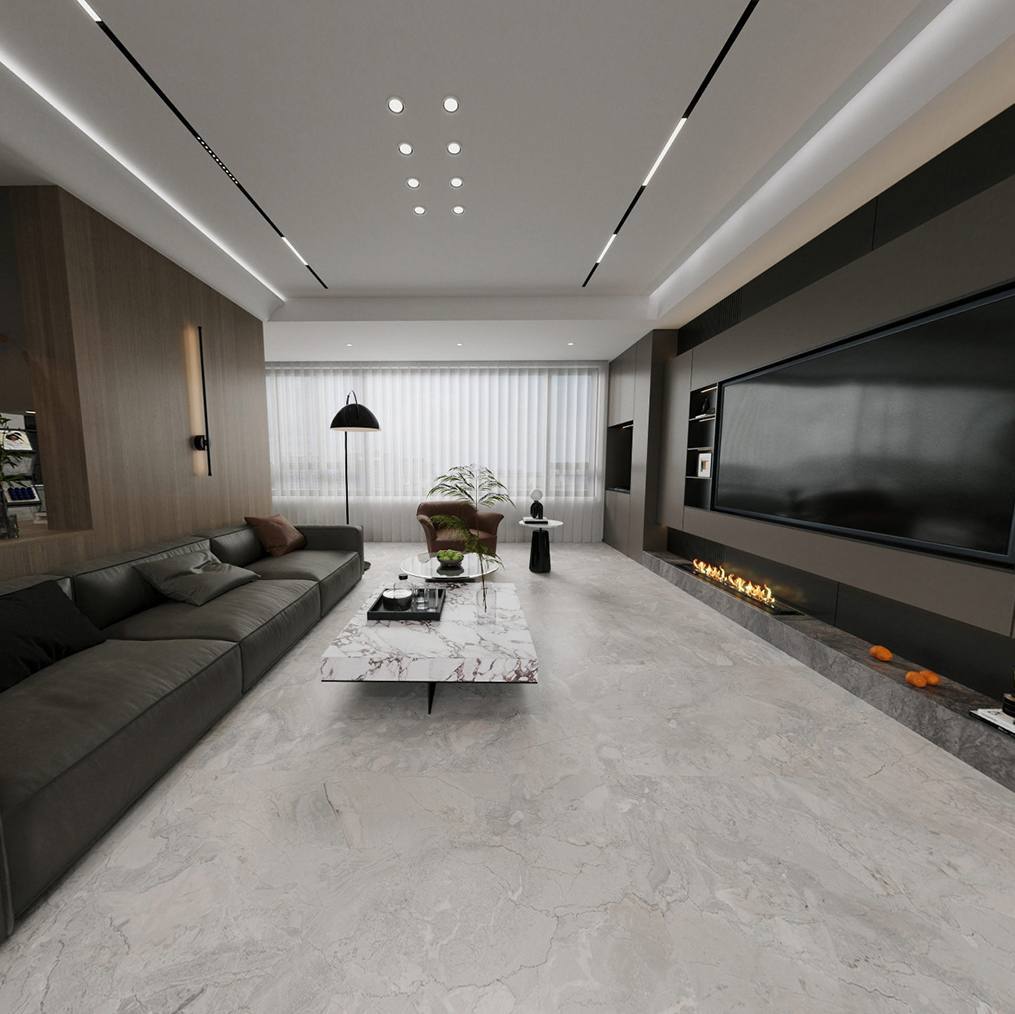
Rectified porcelain tiles are mechanically cut after firing to create straighter, more consistent edges, while non-rectified tiles retain the naturally softened or slightly irregular edges created during production. The difference affects layout precision, grout-joint planning, installation labor, and visual appearance. However, rectified tiles still require a planned grout joint; they should not be installed edge to edge.
!
When I compare porcelain tile specifications for a residential or commercial project, I treat edge type as only one part of the decision. Tile size, actual dimensional variation, warpage, substrate flatness, layout pattern, movement joints, slip performance, and installer experience can affect the finished result just as much as rectification. This guide explains the practical differences so buyers can select a tile and installation method that match the project conditions.
The main difference is the treatment of the tile edge after firing. A rectified porcelain tile is cut or ground to a precise target size after the tile has been fired, producing edges that are generally straighter and more uniform from piece to piece. A non-rectified tile, sometimes called a pressed-edge tile, keeps the slightly rounded edge and dimensional variation created by pressing and firing.
Rectification improves edge consistency, but it does not make every tile perfectly flat or identical in thickness. A large-format rectified tile can still have center lift, corner variation, or slight bowing caused by manufacturing and cooling. For that reason, I always review the tile’s actual dimensions, caliber, warpage information, and installation instructions instead of selecting grout width based only on the word “rectified.”
| Factor | Rectified porcelain tile | Non-rectified porcelain tile |
|---|---|---|
| Edge profile | Mechanically cut or ground | Naturally rounded or softened pressed edge |
| Dimensional consistency | Generally more consistent | Usually greater variation between pieces |
| Typical visual style | Clean, linear, contemporary | Softer, traditional, rustic, or handcrafted appearance |
| Narrow grout appearance | More achievable when conditions allow | Usually requires a wider joint |
| Installation tolerance | Lower tolerance for layout errors | More forgiving of small edge differences |
| Labor expectation | Often higher for large or narrow-joint layouts | Often simpler for standard layouts |
| Best use cases | Modern floors, large-format walls, aligned patterns | Rustic designs, uneven surfaces, traditional layouts |
Rectification affects installation because straighter edges make irregularities easier to see. With a narrow joint, small differences in tile height or alignment can create visible lippage, especially under side lighting or across a large open floor. A non-rectified tile can visually soften minor dimensional variation because the rounded edges create more separation between adjacent pieces.
This does not mean rectified porcelain tiles are always harder to install. They can produce a more controlled layout when the substrate is flat, the tiles have limited warpage, and the installer checks alignment carefully. The installation becomes more demanding when the project combines large-format tiles, narrow grout joints, dark grout, bright lighting, or a running-bond pattern.
A rectified porcelain tile commonly supports a planned grout joint of approximately 1/16 inch to 1/8 inch when the tile manufacturer permits it and the actual tile variation is low. A 1/16-inch joint is not a universal minimum, because the joint must accommodate dimensional variation, installation tolerances, cleaning, movement, and the requirements of the grout manufacturer. For many floors, 1/8 inch provides a more practical balance between a narrow appearance and installation tolerance.
The minimum grout line for porcelain tile should be based on the measured variation of the tile faces, not merely the edge classification. A frequently used industry rule is that the grout joint should be at least three times the actual facial dimensional variation of the tile. For example, if the measured variation is 1/32 inch, a joint smaller than 3/32 inch may not provide sufficient allowance, subject to the product instructions and applicable ANSI guidance.
Rectified tiles do need grout. A grout joint helps accommodate small dimensional differences, supports cleaning, and allows the tile assembly to function with movement in the substrate. Tile installations also require movement joints at appropriate perimeters, transitions, changes of plane, and other locations identified by the project design and applicable installation standards.
Installing rectified tiles with no grout line can cause edges to press against one another as the assembly experiences movement or temperature change. This can lead to chipped edges, cracked grout at nearby joints, tenting, or localized debonding. The nearly continuous appearance should be created with a narrow specified joint and a grout color that matches the tile, not by eliminating the joint.
Non-rectified porcelain tile installation usually allows a wider joint because the rounded edges and greater dimensional variation require more visual and physical tolerance. Common residential layouts may use joints around 3/16 inch to 1/4 inch, although the correct width depends on tile size, variation, grout type, manufacturer instructions, and the selected pattern. Rustic or handmade-look tiles may intentionally use wider or variable joints to support the design.
I still inspect non-rectified tiles before installation rather than assuming that a wider joint solves every issue. Tiles should be checked for caliber, shade variation, warpage, chipped edges, and surface defects before they are bonded. The installer should also blend tiles from different cartons when the manufacturer recommends it, particularly when the design includes visible color or graphic variation.
Non-rectified tiles are often easier to install for traditional layouts because the rounded edge reduces the visual impact of small alignment differences. They are not automatically suitable for uneven floors, however. A flexible edge profile can hide some variation, but it cannot correct a substrate that is outside the flatness tolerance required for the tile format.
The substrate must be evaluated separately from the tile edge. Rectification improves edge consistency, but it does not flatten a concrete slab, correct a crowned plywood subfloor, or remove a height difference between adjoining rooms. Before setting tile, I check the floor or wall for flatness, cracks, moisture concerns, weak areas, and transitions that could affect the finished elevation.
Large-format porcelain tiles place greater demands on the substrate because a small depression can leave unsupported areas beneath a long tile. The required flatness tolerance should be confirmed against the tile manufacturer’s installation instructions and the applicable ANSI or project specification. When the surface does not meet the requirement, the installer may need patching, self-leveling material, grinding, mortar-bed correction, or another approved preparation method.
Tile warpage also affects lippage. A tile with a slightly raised center or corners can show a height difference even when the substrate is flat and the edges are rectified. A tile leveling system can help align adjacent pieces during curing, but it cannot remove excessive warpage or replace proper mortar coverage, correct trowel selection, and back-buttering where required.
The layout pattern changes the grout-joint decision because it changes how tile edges meet. A stacked layout places joints in continuous lines and makes dimensional alignment easier to inspect. A running-bond or offset pattern shifts each row, which can create more lippage where the center of one tile meets the end of another.
For many large-format tiles, especially elongated planks, a 50 percent offset can place the crown of one tile beside the end of another. Many manufacturers and industry installation guides recommend a smaller offset, such as 33 percent, when the tile’s length and warpage make a half-offset risky. The exact layout should be confirmed from the product instructions, but the general principle is consistent: longer tiles and larger offsets require more careful lippage planning.
Lighting and grout color also affect the perceived result. Light entering across a floor or wall can cast shadows along small height differences, while contrasting grout makes every joint more visible. A matching grout color can reduce visual contrast, but it cannot correct inconsistent spacing, insufficient coverage, or a substrate that is not flat enough for the chosen tile.
I begin by recording the nominal size and actual size of the tile, caliber, shade range, edge type, thickness, surface finish, slip-performance information, and recommended application areas. For a Porcelain Tile Manufacturer such as JBN, I would also request current product data, available samples, packing details, and any project-specific technical documentation before approving a large order.
Samples should be viewed under the project’s lighting and placed beside the proposed grout color. For floors, the sample review should include wet and dry conditions when slip performance is relevant. A sample cannot predict every production variation, but it can reveal whether the tile graphic, edge profile, gloss level, and grout contrast suit the space.
The installer should measure the substrate with a straightedge or other suitable method and identify high points, low points, cracks, joints, drains, door thresholds, and changes of plane. The layout should be drawn before installation so that narrow cuts, centered joints, and transitions are visible in advance. This is particularly important for bathrooms, kitchens, long corridors, and open-plan rooms where alignment lines can continue across several areas.
The tile format and pattern should be reviewed together. A 24-by-48-inch tile in a stacked layout creates different alignment demands from a 6-by-36-inch plank installed with an offset. The selected grout joint should also be checked against the tile’s actual variation rather than chosen only for appearance.
The grout joint should be specified after reviewing the tile data and measurements. A rectified tile may permit a 1/16-inch or 1/8-inch joint in suitable conditions, while a non-rectified tile may need 3/16 inch or more. The grout product must also be compatible with the joint width, tile surface, wet-area exposure, and cleaning requirements.
Mortar coverage, trowel direction, back-buttering, and movement joints must follow the tile size and installation specification. A leveling system can assist with alignment, particularly for large-format rectified tiles, but the clips and wedges must be used according to their limits. The installer should not use a leveling system to force bowed tiles into a shape they cannot maintain.
Before bonding the full area, I recommend a dry layout using enough tiles to show the pattern, joint width, color blend, and cut locations. This review can identify problems before mortar makes the layout difficult to change. It also lets the installer confirm whether the selected grout color produces the intended visual separation.
During installation, tiles should be checked continuously with a straightedge and cleaned before mortar hardens. Joints should remain open and consistent, with movement joints maintained where specified. After curing, the grout should be installed within the product’s stated joint-width and substrate conditions rather than treated as a cosmetic filler.
Rectified porcelain tile often carries a higher material price because post-firing edge processing adds manufacturing work. Installation labor can also increase when the design uses large formats, narrow joints, complex cuts, strict alignment, or a running-bond pattern. The total project cost therefore depends on both the tile price and the preparation and labor required to achieve the intended result.
Non-rectified tiles may offer a lower material cost and more forgiving installation, but a wider grout joint can increase grout consumption and create a different maintenance or visual profile. Neither option is automatically the better value. The appropriate choice depends on whether the project prioritizes clean alignment, rustic character, narrow visual joints, surface tolerance, maintenance preferences, or a controlled budget.
| Project condition | Usually suitable choice | Main reason |
|---|---|---|
| Modern room with aligned joints | Rectified | Supports consistent lines and narrow planned joints |
| Rustic kitchen backsplash | Non-rectified | Rounded edges support a softer handmade appearance |
| Large-format open floor | Either, after substrate review | Flatness and warpage matter more than edge type alone |
| Uneven existing surface | Smaller non-rectified format or substrate correction | Wider joints and smaller pieces can be more tolerant |
| Strong side lighting | Carefully selected rectified or non-rectified tile | Flatness, lippage, and grout contrast become more visible |
| Tight labor schedule | Standard-size non-rectified tile | Often allows more installation tolerance |
Choose rectified porcelain tiles when the project requires aligned joints, a contemporary appearance, large-format panels or tiles, and an installer who can meet the required substrate and layout tolerances. Rectified edges work especially well when the grout color, tile graphic, and room lighting are planned together. They are a design and specification choice, not a substitute for substrate preparation.
Choose non-rectified porcelain tiles when the project benefits from a softer edge, wider joint, traditional pattern, or greater visual tolerance around small dimensional differences. They can be practical for rustic interiors, smaller rooms, and designs where the grout joint forms part of the appearance. The tile still needs proper coverage, movement accommodation, and a substrate suitable for the selected format.
Before approving a purchase, I use this checklist:
JBN, a Foshan-based Porcelain Tile Manufacturer, lists polished porcelain, polished glazed porcelain, rustic tiles, wood-look tiles, and wall tiles among its product categories. The company also describes OEM and ODM services, sample support, customization, automatic production equipment, and third-party quality inspection reports. For a project requiring a specific size, surface, color, or edge treatment, those documents should be reviewed alongside the tile sample and installation specification.
Rectified vs Non-Rectified Porcelain Tiles: Installation and Grout Joint Differences come down to more than edge appearance. Rectified tiles have mechanically finished edges and can support narrower, more uniform-looking grout joints, but they still require grout, movement accommodation, accurate layout, and a suitably flat substrate. Non-rectified tiles retain softer pressed edges, usually work with wider joints, and can provide greater visual tolerance in traditional or rustic installations.
My recommended next step is to compare the actual tile dimensions, caliber, shade variation, warpage, surface performance, manufacturer instructions, and intended layout before choosing a joint width. Then review the substrate with the installer and approve a sample under the project’s lighting. When JBN or another Porcelain Tile Manufacturer supplies the product, request the technical data and sample before placing the full order so the edge type, cost, grout appearance, and installation requirements are evaluated together.
Feel free to reach out for any queries. We would be happy to help!
We look forward to working with you.
Navigation
Navigation
Contact Us
Telephone: 0086-757-83327093
E-mail: jbn002@jbnjbn.com
WhatsApp: +86 136 9028 1303
WeChat: +86 136 9028 1303
Address:Building 4, Area B, Ceramics International Trading Center, Jihua Xi Road, Foshan, Guangdong, China
Get in Touch
Get in Touch